Review: Watch & Smile 2.0.7

Developer: binuscan
Price: $80 plus s/h directly from binuscan
Requirements: 18 MB of application RAM.
Recommended: 30 MB of application RAM.
Trial: Feature-limited (cannot save files)
Overview
Watch & Smile is used to create slide shows of your images. You can add text and sound, extensively edit and modify imported images, and control the timing of each image within the slide show. Completed slide shows can be viewed with the freely distributable Watch & Smile Player, or they can be converted into QuickTime movie format.
Installation
The downloaded installation file is 12 MB. The standard VISE installer requires you to quit all applications before installation. You can choose the location for the installation folder (18 MB). No restart is required after installation.
Launching Watch & Smile
After you launch Watch & Smile and click on its annoying splash screen, it takes over your computer. The menu bar is inaccessible, Control Strip gets turned off, and volume is reduced to level 3 (out of 7). Watch & Smile’s “friendly TV remote control interface” appears, and then you guess at the best way to proceed. You might decide to read the manual, except the Watch & Smile demo doesn’t have one.
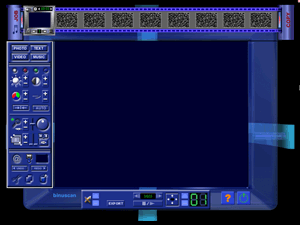
Watch & Smile Work Space at Startup
You might decide to launch a help file, but clicking the Help button results in a failed attempt to load a help file into Netscape Navigator. Hmmm, not a great start. You then try to proceed logically. Your main goal is to create a slide show of images, so clicking on the Photo button seems appropriate. A small window with three buttons appears. The TWAIN button allows you to retrieve an image directly from a TWAIN-complaint scanner or digital camera. The image is saved as a TIFF file.
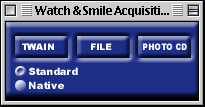
Photo Importing Choices
The FILE button allows you to import a single image file. The following formats are supported: TIFF, JPEG, BMP, PICT, PCD, PSD, PCX, PNG, TGA, DCX, and GIF. The PHOTO CD button allows you to import a picture directly from a Photo CD. Note that you cannot simultaneously import multiple image files.
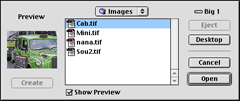
Window for Importing an Image
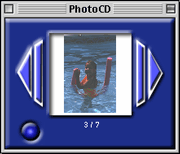
Photo CD Preview Window
Using Watch & Smile to Create “Scenes”
The TEXT button pops up a text creation and editing window. You can select size, style, alignment, and color for the text block. The text block becomes a layer in your image. It can be moved, resized, and reordered in relationship to other layers. Watch & Smile does not have a captioning feature, so using text in your scene is the only way to display a title for each image.
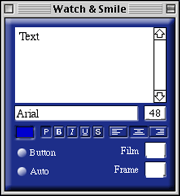
Text Editing Window
You can perform many image editing functions with Watch & Smile. Adjustments accessible from the second section of the “remote control” tool panel on the left include brightness, contrast, saturation, and sharpness. You use the plus and minus “rocker” buttons next to each of the four icons to increase or decrease the function. You also can adjust RGB color channel intensity by clicking on the red, green, or blue button and then using the dual color button (that replaces the brightness button). All these adjustments are crude because only 20 settings are possible per control. The AUTO button applies Watch & Smile’s photo adjustment algorithms to the selected image. The Revert button (two arrows pointing to a vertical bar) removes ALL image adjustments. There is no way to undo adjustments singly.

Window Used With Advanced Image Retouching Tools
The third section of the “remote control” contains the following tools: zoom, rotate, layers, opacity, contour shading (edge dissolve), flip (horizontal or vertical), and cutting out. The zoom button has an adjacent light. It changes from green to orange to red if you enlarge a picture so much that interpolation is necessary. You can zoom in or out by pressing the + or - buttons or by using the slider to the right of the zoom button. The rotate button works like a dial. The selected image rotates in parallel with the dial’s rotation. There are no restraint keys for 45 or 90 degree increments, but clicking on the appropriate quadrant of the rotate button generates a 0, 90, 180, or 270 degree rotation. The layers button lets you change the order of items within a scene. A scene consists of all the elements within a single slide or frame. Scenes can contain multiple images, text blocks, and QuickTime movies. Each of these items gets a layer number. You change the stacking order by selecting an item and then pressing the + or - buttons next to the layer button. The opacity slider (left bar on the vertical slider) changes the opacity of the selected image. The contour shading slider (right bar on the vertical slider) increases or decreases the width and intensity of the edge dissolve region. The flip horizontal and flip vertical buttons work as expected. The cutting out button pops up a small window with three shapes: rectangle, oval, and multigon. You select one of those shapes and then choose which part of the image you will cut out. (The residual image outside the cut area is discarded. If you need the intact image, make a copy and use the cutting out tool on the duplicate.) The rectangle and oval selection marquees can be resized and moved before the final cutting. The multigon tool lets you select irregularly shaped areas by clicking to create vertices. Double-clicking closes the multigon.
The bottom section of the “remote control” contains 8 buttons. The @ button launches your Web browser and directs it to the binuscan Web site. (In the PC version, this button launches the IE channel, which allows you to view Web pages within the Watch & Smile window and to select images of Web pages for use in your slide show.) The paintbrush button brings up six advanced image editing tools: warp, perspective, paint, clone, changing colors, and plug-ins. The warp (envelope) tool lets you distort your picture by moving edges inward, outward, or to a new position. The perspective tool lets you deform an image from an edge or a corner. It does not provide a true visual perspective. The paint, clone, and changing colors tools all use a new tool window to the right of the image.
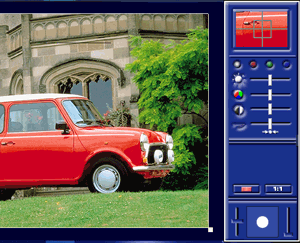
Using the Painting Tool
The paint tool (it looks like a bazooka but is supposed to be an air brush) modifies images with a round paint brush. You first select a paint color by dragging your image within the small target window. Center the target over the color of choice. (What, you want to paint with a color that isn’t in your image? Find the color that’s closest to what you need and try to modify it using RGB color intensity adjustments). You use sliders to adjust the brightness, saturation, contrast, sharpness, and RGB color intensities of the paint. The sliders to the left and right of the white circle control the diameter of the paint brush and the opacity of the paint. After all adjustments are made, you can begin painting the selected image. If you make a mistake, the undo button on the left removes ALL your painting changes (not just your most recent change).
The change colors tool (the blue to orange button) is for modifying colors within a selected range (painting only on a portion of colors). You select the color to be changed in the upper window. You use the color change slider in the middle of the tool window to select a new color. You can make fine adjustments by clicking in the color window above the slider. When you have selected the new color, you lock it in by clicking the OK button. The horizontal sliders below the color change slider control the hue and darkness ranges of the selection (for overpainting). Moving the sliders further to the right means that a greater variety of colors and darknesses will be overpainted. The vertical sliders at the bottom control the diameter and opacity of the round paint brush. These adjustments are indicated by the white circle. Once all items are set, you can paint on the image. Paint will only be applied to the parts of the image that match the original target color (within the zone specified by the hue and darkness sliders). In my example, most of the reds on the car body were overpainted with bright green. Note that some of the darker reds did not accept the green paint. This tool works best when an image has large areas of uniform color.
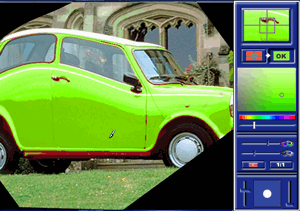
Using the Color Change Tool
The clone tool lets you copy a circular region of an image and apply a modified clone to another part of the image. You can modify the cloned image’s brightness, contrast, saturation, sharpness, and color channel intensities.
Creating a Multimedia Slide Show
You set up your slide show by using the film strip frame at the top. You can rearrange scenes by dragging them to other frames. A slide show can contain 255 frames. You use the slender arrow buttons on the upper left and right to select which 9 scenes are visible for editing. You can insert a blank frame in from of a scene by clicking on the Insert button in the upper left corner of the selected scene. You can attach sound or music to a scene by clicking the Sound (notes) button.
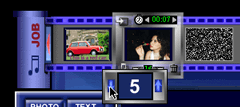
Editing Your Slide Show
A menu appears with three choices: None, New, and Import. New lets you record a sound from a microphone or from an audio CD. Import lets you import an AIFF file for the scene. The scene display time is adjusted by clicking the arrows to the left and right of the time (displayed in seconds). The default setting is 5 seconds. You cannot type a display time value. You cannot select multiple scenes and set a global display time. Transition effects are selected by clicking on the small number at the bottom of the scene. Each number represents a different transition effect. The 17 choices include various wipes and dissolves, slow fade in, and no transition effect.
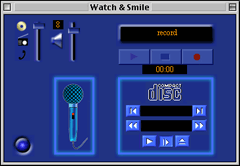
Sound Recording Window
You can have background audio for the entire slide show (in addition to audio attached to scenes). You do this by clicking on the Music button on the left side of the “film strip” area. As with scene audio, you can record audio from a microphone or an audio CD (one track only), or you can import an AIFF file. Unfortunately, you cannot link multiple files for background audio.
The tool palette at the bottom of the window lets you play your slide show. You can adjust audio volume, move to a numbered frame, pause or play the show, and toggle between window and full screen views.
Slide Show and Export Controls
Other buttons include Help (which doesn’t work), Quit, and Export. Clicking Export allows you to save or print a scene or save an entire slide show. Scenes are saved as JPEG files or as JPEG files within a Web page. A slider adjusts JPEG quality (0 to 100%). Slide shows can be exported as a QuickTime movie or as a Watch & Smile movie file. Slide shows in native format can be viewed with the free Watch & Smile Player application. However, this application has serious limitations. It took 54 seconds to load a 15 slide 1.3 MB demo file. The Player has a control panel that can be moved but cannot be hidden! It always covers part of the picture, even when you are viewing in a small window instead of full screen.
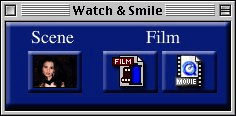
Export Window

Player with Annoying Control Panel
Bugs, and Problems
Clicking the Help button resulted in a failed attempt to launch the help HTML page in Netscape Navigator. I could launch the Help file manually by navigating through the following folder hierarchy: Watch & Smile 2 Demo:Help:local:Current:main.html.
The left and right arrow buttons in the Photo CD window sometimes jump ahead many photos after a single mouse click. A similar problem occurred when trying to record audio CDs. The track advance buttons jumped ahead. On a CD with 12 tracks, I could only select tracks 1, 4, or 8.
The cutting tool mini-palette cannot be moved or hidden while editing, and it blocks part of your image. You need to move or resize your image if you need to see the blocked area.
According to binuscan’s Web site, Watch & Smile lets you place navigation buttons within individual scenes, but I could find no way to do this. The Text Window has a “Button” button, but it did not do anything. The Text Window is also supposed to allow creation of text that will show in every frame of the “film,” but that feature did not work.
Omissions
The list of missing features is quite long. The most important missing feature is the inability to import all images in a folder. A Watch & Smile slide show can contain 255 frames, and you must import each frame individually, which is a tremendous time waster. Similarly, the fact that Watch & Smile takes over your computer screen prevents features like drag and drop and cut and paste between applications from working. The lack of serial undos is another big omission. If you make a mistake when editing an image, all your previous changes are lost, unless you revert to a previously saved slide show. The inability to change default parameters or to select multiple scenes simultaneously means that you must go through the tiresome process of adjusting viewing times and transition effects for every scene.
Watch & Smile’s paint tool doesn’t let you choose any color, you must use one derived from the image you are editing. You should have access to the entire spectrum of colors. Similarly, text colors are constrained to those in Watch & Smiles 256-color palette.
Watch & Smile lets you import only AIFF audio files. It cannot import MP3 audio files (a serious limitation), although its Web site refers to MP3 audio. You are limited to one background audio file per slide show, and Watch & Smile cannot merge audio files.
Documentation
No documentation is included. The help file consists of an HTML page displaying the control regions of Watch & Smile. You click on an item to display information about its function. There is no index or table of contents, and there is no overview on how to use Watch & Smile. Also, this file contains helpful instructions such as “holding the ALT key on Mac.”
Technical Support
Technical support is only offered through a Web page form. The binuscan Web site has no troubleshooting information, no frequently asked questions, no hints or tips, no examples or templates, etc.
Summary
Watch & Smile is the most frustrating graphics application I have encountered. Non-standard interfaces can work well; KPT Bryce exemplifies that. Using a TV-style remote control for viewing a presentation makes sense, but using that same interface to create a multimedia slide show is non-intuitive and inefficient. The negative effects of the interface are worsened by programming errors, lack of keyboard shortcuts, inability to switch between applications, poor help files, and lack of documentation. Obviously, Watch & Smile is a mediocre port of a mediocre Windows application. I felt as if I were being teased: Watch & Smile has features that I long for, but its inefficiencies and bugs make it almost painful to use. Binuscan devotes too few resources to this Macintosh port: it hasn’t been upgraded since March 2, 2000.
Reader Comments (0)
Add A Comment